Short intro: Ready to party with your fingertips? I’ve got six patriotic nail designs to make your July 4th pop, all using the same red, white, and blue palette with a splash of silver glitter. Whether you’re into clean stripes or sparkly accents, there’s a look here for every vibe. Let’s dive in and pick your favorite.
1) Easy Reverse Waterfall Nails
– Start with a crisp white base to set the stage.
– Use a fine nail art brush to paint uneven, waterfall-style lines toward the cuticle in red, white, and blue.
– Keep the lines a bit irregular for that chic, handmade feel.
– Finish with a top coat to smooth and seal.
Why this works: The reverse waterfall gives a modern twist on classic flag colors without shouting “USA!” at every brushstroke. It’s artful, not overbearing, and super flattering on short or long nails alike.
2) Dot-Pattern Flag Nails
– White base again to keep things clean and bright.
– Gather three dotting tools of varying sizes (large, medium, small).
– Working color by color, place large dots near the cuticle, medium dots in the middle, and small dots toward the tip.
– Let some dots overlap to add depth, but leave some base showing so it doesn’t look crowded.
– Seal with a top coat for a smooth finish.
Deeper dive (why dots work): The layered dot technique gives a playful nod to fireworks without needing a stencil. It’s cute, precise, and forgiving if you’re still getting the hang of nail art.
3) Studs and Gems Accent Nail
– White base for the accent nail, blue and red on the other nails.
– Gather a mix of affordable studs and gems from places like eBay and Born Pretty.
– Attach with a regular clear polish (not quick-dry top coat) so they set neatly.
– Use a wax pencil to place the pieces in a mosaic, random yet intentional.
– Optional: seal with top coat to lock everything in.
Pro tip: The emphasis on a single “sparkly” nail keeps the look classy rather than circus-y. It’s a party-ready focal point without going overboard.
4) Vinyl Tape Stripe Nail Art
– White base plus vinyl tape (straight tape) down the middle.
– Paint half the nail blue, remove the tape immediately for clean lines.
– Add horizontal tapes on the blue half, spaced evenly; paint red between them and remove quickly.
– Apply top coat to smooth, then consider some star accents for a patriotic twist.
Notes: Tape placement minimizes smearing and gives you crisp geometric lines. If you don’t own vinyl tape, regular masking tape or painter’s tape works in a pinch.
5) Star-Vinyl Accent on Blue Base
– Blue base must be completely dry.
– Use star vinyls to create a bold pattern (from What’s Up Nails or similar).
– For a cleaner finish, sponge the nail with blue polish under the vinyl to reduce bleeding, though painting over the vinyl works too.
– Remove the vinyl carefully to reveal sharp stars, then seal with top coat.
Why fans of this design love it: It’s patriotic, graphic, and instantly recognizable as Fourth of July chic. The star shapes are flattering on most nail shapes too.
6) Drippy Flag Nails Inspired by Spellbound Nails
– White base, then use vinyls to section the nail with red between the tapes.
– Let the red dry, then add drips with a small nail-art brush to create curved, rounded lines.
– Fill the top half with blue drips, then brush silver glitter over the blue to mimic the stars.
– Finish with top coat to lock the look in.
Inspo and execution: The drippy effect is bold and a little edgy—a fun take on the classic flag theme. If you’re feeling daring, add extra glitter for full-on fireworks vibes.
FAQ
Do I need fancy tools to recreate these designs?
The short answer: no. You can start with a white base, a nail art brush, a dotting tool (or even a toothpick), and some common tapes. The more specialized items (vinyls, studs) just give you a sharper, more professional finish, but they aren’t mandatory.
What polishes are essential for a cohesive look?
Stick to a simple trio: white, blue, and red. A few silver or glitter polishes will dial up the festive vibe. The key is consistency across designs so the set feels intentional rather than patchy.
How long do these designs last on nails?
With proper prep and a solid top coat, expect a few days of wear before chipping—especially if you’re doing a lot of nail art. If you’re rough on your nails, consider an extra layer of top coat or a quick-dry top coat to boost longevity.
Can I mix and match these designs on both hands?
Absolutely. Mix and match elements—the accent nail from the studs design, a stripe nail, or a dot pattern on the other hand. It keeps things fun and personal while still reading as a cohesive Fourth of July set.
Any tips for avoiding smudges during design?
Patience helps: let each layer dry fully before applying tape or vinyls. Quick-dry top coats are great for some steps, but if you’re sticking vinyls, you want the base to be dry enough that it won’t pull up.
Conclusion
If you’re looking to celebrate the 4th with your nails, these six designs have you covered—from clean, artsy chaos to bold, glossy statements. Whether you want a delicate dot pattern or a star-studded statement nail, there’s something here for every level of nail-artist confidence. FYI, you can tweak colors or add extra glitter to fit your personal style. So grab your polishes, set aside some time, and get ready to show off nails that truly shout “USA!” with flair. Have a fantastic and safe Fourth of July, friends.
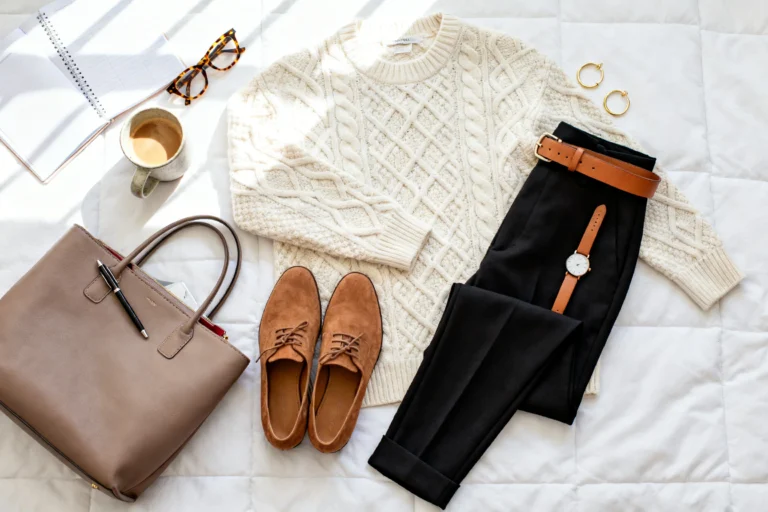
You’re about to level up your game-day wardrobe with outfits that look cute, feel comfy, and somehow still say you mean business. These looks are styled for the rink-view, the after-party, and all the moments in between. FYI, you’ll want to bookmark this. 1. Slouchy Knit Dress + Leather Jacket Power Play This look is…
These looks are loud, glamorous, and totally wearable for everyday life. From stadium vibes to chic off-duty moments, get ready to steal the spotlight without trying too hard. FYI, these outfits are designed to feel as fearless as a backstage pass. 1. Leather-Lace Night Jacket: Gallery-Ready Edge Without the Drama This look feels like you…
Swap day is the perfect excuse to mix up your style and have a little fashion fun. These outfits prove you can blend student energy with teacher-chic vibes and still feel comfy as heck. Let’s dive into seven ready-to-wear looks you can actually pull off tomorrow. 1. Girls Power: Skirted Skool vibes with a Modern…
You want looks that say “I’m in charge” but still let you sprint to the copier, hunch over lab stations, and stack 80 essays without a wrinkle apocalypse. These seven outfits balance authority with ease, comfort with creativity, and practicality with personality. Get ready for classroom-ready fits that work hard, look polished, and feel like…
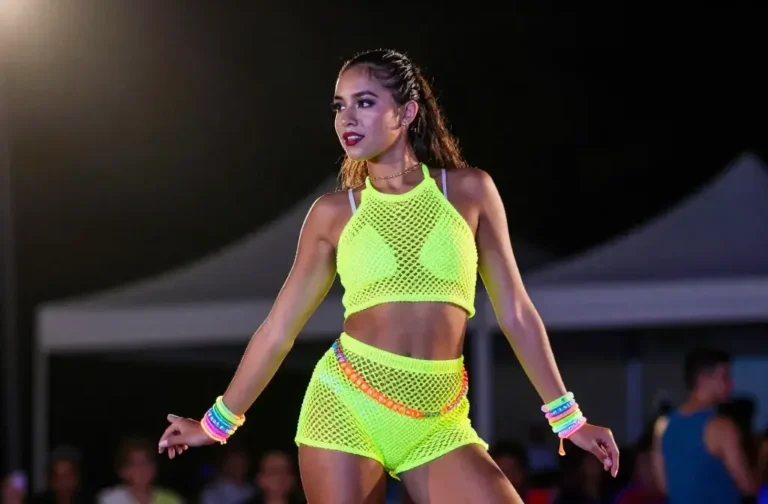
Ready to glow up the dance floor with handmade magic? These crochet rave looks blend texture, color, and festival-friendly flair so you never blend into the crowd. FYI, crochet isn’t grandma vibes here—it’s a bold, brave statement. 1. Neon Net Mesh Set That Sizzles Under Blacklight This outfit hits the perfect balance of daring and…
Ready to elevate your golf girl vibes without losing an ounce of personality? These seven outfits strike the perfect balance between sporty, chic, and totally you. FYI, you’ll feel confidant, comfortable, and camera-ready wherever the day takes you. 1. Classic Preppy Polo Pairing With Modern Edge This look nails that timeless golf atmosphere with a…